Connect the wi-fi module. Turn on WiFi on laptops of different models. Description of key module features
Greetings to the readers of our blog!
We have already had a variety of wireless adapters on reviews and tests many times, and once again looking at these articles, I suddenly found that we had no detailed universal instructions on how to connect a computer to the Internet via wifi using a USB adapter. I hasten to fix this misunderstanding in this post on setting up a Wi-Fi adapter!
The way to connect your computer to the Internet via WiFi
Buying a "large" desktop PC, few users think in advance that in the future there will be a need to use Wi-Fi on it. However, if such a moment has arrived, then the only right solution would be to install an additional PCI or USB adapter, with which you can connect a regular desktop computer to the Internet via a wireless network. By the way, we devoted a separate large instruction - it will be useful to read before buying.
How to connect a USB adapter to a computer?
The procedure is as follows:
- Plug the adapter into a USB port
- Start using WiFi internet
Yes, everything is so simple, but you thought? If you have Windows 7, 8, 10 installed on your computer or laptop, then nothing else is required.
An important nuance is if your WiFi adapter supports operation via the USB 3.0 port, it is better to connect it to it.
No, it will work on 2.0, but for your convenience, maximum speed can be achieved only on the latest standard.
As for the disk with drivers and software, which is most often included, it makes sense to get it only if you have outdated Windows XP. Most often, it is for her that you need to install drivers separately. The installation program, in fact, replaces the standard wired in Windows, so whether to install it or not is also a business matter. You can install out of curiosity. Sometimes, by the way, it happens that through it you can put the USB adapter into WiFi access point mode and distribute Internet from other computers to other gadgets.
How to set up a WiFi adapter?
Well, let's get to practice. We connect the WiFi adapter to the computer in the USB port
and wait until the new USB device is recognized and successfully installed

If this miracle did not happen, then in the old-fashioned way we take a CD

and install from the driver disk.

After that, the WiFi icon will appear in the list in the lower right corner of the panel - clicking on it will open a list of available wireless networks for the connection

We select the one we need - that is, from your router, to which you have access - and click on the "Connect" button

enter password

and enjoy the internet through wifi.
If there is a WPS button on the adapter case, then you are extremely lucky, since you can connect to a router and configure it to work with its wifi network in automatic mode.

To do this, activate the WPS mode on your router

and briefly press on its body a similar WPS button.

Then we also press this button on the adapter once. After a few moments, the computer or laptop will be online.
This is how easy it is to connect a wifi adapter to a computer and configure via USB - I'm sure you will succeed too! If you have questions, ask in the comments.
After installing a Wi-Fi router, many people have a question, but how now to connect to the Internet a regular desktop computer that does not have Wi-Fi. Previously, the Internet was connected to the computer via cable, but now what to do? I do not really want to lay a network cable from the router to the computer. After all, we installed a router in order to get rid of wires in the house.
Yes, after installing the router and setting up a Wi-Fi network at home or in the office, all laptops, tablets, phones and a number of other devices will be able to connect to the Wi-Fi network, "by air". These devices have a built-in Wi-Fi receiver. And if you still have a stationary computer, to which you also need to connect the Internet, then there are only two options:
- From the router to the desktop computer lay a network cable. But, this option is not often suitable, since you do not always want to mess with cables, and sometimes there is simply no way to route this cable to a PC.
- Well, the second option, which we will talk about in this article, is connecting an external or internal Wi-Fi adapter to your computer. With it, a regular, stationary computer will be able to connect to the Internet via Wi-Fi.
I faced exactly the same situation at home. After installing the router, all devices connected wirelessly. But the computer that needed to be left, I connected via Wi-Fi using a USB Wi-Fi receiver. It is about these receivers that I will now discuss in more detail.
Connect your computer to Wi-Fi using an adapter. Without cable
As I wrote above, for ordinary computers that do not have built-in wireless network receivers, there are a large number of network adapters on sale. These adapters are both external and internal. As for prices, they are not very expensive. Of course there are different models from different manufacturers. But, the cheapest will cost you about 6-7 dollars (these are devices of popular manufacturers). Tenda has inexpensive models. For example, I also have an inexpensive, external USB Wi-Fi adapter TP-LINK TL-WN721N. It looks like this:
Works great. You will need to prepare instructions for setting it up on a PC. By the way, many people call such adapters "flash drives for connecting to Wi-Fi" :)
How to choose a Wi-Fi adapter for your computer: external and internal
Let's see what these adapters are, and how to choose such an adapter for your PC. So, they are external and internal.
External adapters
They are connected to the USB connector of the computer. To install it, you do not need to open the system unit, this is undoubtedly a plus. They look like ordinary flash drives. There are small ones, there are ones like in the picture above, and there are also antennas. Those with antennas, I advise you to buy if the Wi-Fi network signal is not very strong in the room where you have a computer.
If you are not very computer savvy, then I recommend buying an external Wi-Fi receiver. Almost anyone will do. The installation is not false: they connected the adapter to the computer’s USB connector, installed the drivers, and that’s it, you can.

Here are more photos of external adapters:

Internal adapters
These adapters plug into the PCI (or PCI Express) slot on your computer's motherboard. It is clear that to install such an adapter you need to disassemble the system unit. Installation, in principle, is also not complicated. They removed the cover from the system unit, installed the adapter in the PCI connector, rebooted the computer, installed the driver, and that’s it.
Outside the system unit, the antenna of the adapter will look out, or even several. This is all for a better reception. After all, if a regular USB receiver can be connected through an extension cord, so that it would better receive a signal, then this will not work with an internal adapter.
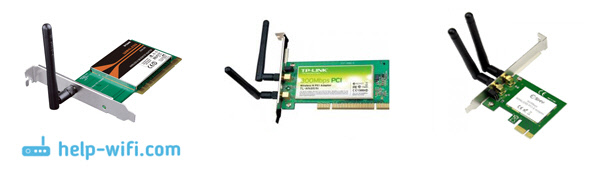
Here's what internal PCI adapters look like:
Which adapter is better to buy to connect a regular computer to Wi-Fi? Yes, in principle, what's the difference. But, for some reason, it seems to me that external USB adapters are more convenient and practical. They can be easily connected to another computer. The connection and installation process is a bit simpler.
As you can see, connecting a desktop computer to a Wi-Fi network is not at all difficult. But, you can get rid of the wires. This is especially true if the router is far from the computer.
The module for wireless Internet connection is an extremely useful device for modern users. From now on, you don’t have to spend time downloading new products in the world of cinema or downloading the next season of your favorite series, since you can view content online.
Of course, many people watch movies, TV shows on tablets and smartphones, but you must admit that still, in this aspect, a large TV screen is preferable.
Many Samsung Smart TVs have a built-in module for wireless Internet connection. If it is absent, then you can always connect an external adapter.
Buying a Wi-Fi adapter for a Samsung TV is a really smart decision. Judge for yourself, now there is no need to pull the cable to the TV device, the wireless connection is really more practical and convenient.
The router will ensure the conversion of the digital signal into radio waves, as a result of which broadcasting will be carried out. The adapter will give out a signal, so you can play content online without too much difficulty.
What is a Wi-Fi adapter for?
Today, almost all devices, from smartphones to air conditioning, have a built-in adapter for wireless Internet connection. Of course, television equipment was no exception to this rule. Samsung TV Internet Adapters provide enhanced functionality.
Network modems for TVs are divided into 3 types in accordance with the connector for connection:
- PCMCIA is an obsolete interface; modern TV models are not equipped with it. However, if you have such an entrance, then this option can be considered.
- HDMI is an interface for simultaneously transmitting audio and video signals in the highest quality. Without exception, all TV devices are equipped with this input, since it provides high speed information transfer.
- USB - input, which are equipped with almost all TV models. Of course, this is the most common way to connect a Wi-Fi module.
Smart adapter visually looks like the most ordinary flash drive. Connection is via a USB connector or any other available interface.
Equipment of this type is on the market in a wide range. Naturally, each user may have problems with the compatibility of the adapter and the TV. Therefore, this aspect should be given special attention.
How to find out if the TV supports the adapter
First, you need to determine the year of manufacture of your TV. Models that were produced before 2010 absolutely do not support an Internet connection, therefore, a Wi-Fi adapter will not help either.
Newer devices mainly support Wi-Fi internet connection, but there are still some exceptions. To determine the functionality of your equipment for sure, just read the instructions.
If the instructions clearly state that there is a built-in module, then you definitely will not have to buy alternative adapters for Samsung TV. This applies to almost all models newer than 2014, except budget ones.
Suppose that you have already thrown out the box, and with it the instruction. No problem, open the Samsung official web portal to learn this information. Do not rely on information from other sources, as they may turn out to be false.
In the event that the TV device you are using is younger than 2010, but it does not have an integrated adapter, but Wi-Fi support is implemented, contact the appropriate store to purchase the module. Adapters, like televisions with wireless Internet connection support, began to appear after 2010.
Separately, you should analyze the compatibility problem. Buy adapters from Samsung for TV from the same manufacturer, then absolutely no difficulties will arise with the connection. Each device has its own series, which allows you to determine compatibility. Latin letter - symbol of the year of production of equipment:
- C - 2010;
- D - 2011;
- E - 2012;
- P - 2013;
- H - 2014;
- etc.
When choosing a device, be sure to consider the series, and then you are definitely not mistaken with the purchase.
How to choose the right
To begin with, the devices are branded or from third-party manufacturers. Of course, the devices of the second group are much cheaper than the original adapters. Of course, the low price helps attract consumer attention.
The cost of the original USB Wi-Fi adapter for Samsung TVs is about 4000 rubles, while the price of modules from other manufacturers ranges from 1000-3000 rubles. It is clear that doubts arise, is it worth it to overpay? Maybe the difference is only in the brand, and it’s easier to save?
Of course, that the original devices still have certain distinctive features, so a bit overpriced is a completely natural phenomenon. We list only the most significant advantages:
- Official warranty and after-sales service. When buying a device made in China, you do not have to rely on warranty service. In the case of Samsung branded devices, everything is exactly the opposite.
- No compatibility issues. Samsung TVs are sharpened for synchronization with original gadgets. It is possible that due to the purchase of a device from a third-party manufacturer during operation, compatibility problems will appear.
- Long service life. As practice shows, budget models of the equipment in question function correctly, but only up to a certain point. After installing the first service pack, problems with device recognition and all kinds of other failures appear.
Based on the foregoing, we conclude that in this case, saving money is an inappropriate solution. It’s easier to pay 1-2 thousand rubles more, but get a high-quality adapter with a guarantee and a long service life.
Nevertheless, the manufacturer is far from the only criterion for choosing a module for wireless Internet connection. Particular attention should also be paid to technical specifications. It is from this parameter that the functionality and performance of the device is determined.
A key indicator of the adapter for Samsung Smart TV is the Wi-Fi standard. The difference is in the maximum possible speed of information transfer. The grading of available devices is carried out in accordance with the following parameters:
- Wi-Fi a / b - up to 3 Mb / s;
- Wi-Fi a / b / g - up to 24 Mb / s;
- Wi-Fi a / b / g / n - up to 50 Mb / s (in new adapters - up to 150 Mb / s).
Choose a router in accordance with the tasks assigned to it. For example, for the most comfortable playback of media content in the highest quality, you should acquire a device of the latter category. Otherwise, it is possible that the picture or sound will freeze.
In some cases, the cost of equipment is affected by additional functionality, for example, an interface for connecting to a TV via HDMI. Ask yourself if you need this connector? If so, you can overpay a few hundred rubles.
To understand which adapter is right for you, analyze the configuration of the device. For example, it is desirable that there is a USB cable, as this will allow the module to be located farther from the TV, while maintaining high signal quality.
Connect and configure the adapter
The module is connected mainly through the USB interface, which is located on the rear panel of the TV. After that, you need to take the remote control and open the main menu. Go to the section "Network"using the navigation buttons. Find the network settings and open them.
To activate an item in the menu, press the button "Enter", it is located exactly in the middle of the remote control. You must select a tab "Start". To connect the TV to a Wi-Fi router, select a wireless connection.
Upon completion of a short search, a list of available Wi-Fi points appears on the screen, here you need to select your home network. Using the button "Enter", activate your network, and then enter the password if it is, of course, protected by it.
Of course, entering a password is fraught with certain difficulties, since each letter is selected using the arrows located on the remote control. In the future, the TV will be connected automatically. A confirmation window opens, there is no need to change anything, just finish the procedure for synchronizing the adapter and the TV.
That's all, the setup and connection procedure is complete. Go to the application menu and check your internet connection. Exit the main menu by pressing the button on the remote control "Return", and then go to Smart TV.
To test the installation results, launch a browser, try to open a website. If the connection is stable, the portal will open instantly. Additional settings are completely optional.
Many people face various problems due to which there is no Internet connection. To eliminate the appeared failure, be sure to check the router's operability, in particular, if the corresponding indicators are on, reboot it if necessary. If the result is still not there, then you need to contact the provider.
If the adapter for Smart TV is connected correctly, but sites or players do not display correctly, it is possible that the problem lies in the built-in browser. Perhaps the whole thing is in the site itself. To avoid software crashes, update your operating system regularly. Firmware should always be up to date.
Popular adapter models
The lineup of Samsung TVs is extremely extensive, but there is no list of branded devices available to them. The South Korean company produces only a few different accessories for the equipment of each series, wireless network adapters are no exception to this rule.
Perhaps the most popular portable adapter is the WIS12ABGNX. It is connected to the TV via a USB port, equipped with a small antenna. The device is compatible with almost all TVs labeled Wi-Fi Readyissued since 2011.
The adapter supports various communication standards, including not the most popular ones, for example, IEEE 802.11a / b / g / n. The bandwidth offered to the user is more than enough to watch Full HD movies online.
Similar functionality has another popular model - WIS09ABGN. The name indicates that the adapter supports standard N, but only in Draft mode.
There are alternatives. Other companies do not develop portable adapters from scratch. On the contrary, they simply improve the finished platform. Unique identifiers are added and a new design is created. Therefore, if you bought an adapter from a third-party manufacturer, but because of this there were compatibility problems, it is enough to simply modify the identifiers.
You need to understand that to solve the problem, therefore, only those users who are extremely knowledgeable in technology can do it. The Samsung Wireless LAN Adapter is flashed exclusively on the Linux operating system. Of course, that any error can cause the failure of the device.
Naturally, you can buy already modified D-Link or TP-Link modules, which were previously reflashed by experts. They will cost a little cheaper compared to branded accessories.
Note.
Today, full-fledged work at the computer is possible only with access to the Internet. Outdated wired connections have lost their position - just connect to the nearest access point. And if on laptops the adapters, as a rule, are already installed by the manufacturer, then for a stationary PC you will need to install a Wi-Fi adapter. Let's figure out how to choose the best model for different requirements.
Types of Adapters
First of all, you need to determine the type of wifi adapter for the computer. According to the characteristics of the installation, two large groups are distinguished. The first includes external models that connect outside the computer. The second group includes internal options that are mounted in the device. Standing apart from the fashion, but still found adapters on the CardBus bus, installed in a special connector.
External Wi-Fi Adapters
External models are the most popular and easiest to install, because they do not require special knowledge of the computer device. They can be installed outside the PC, without opening the case. It is only necessary that the corresponding port is free, most often USB.
Dimensions may vary: compact models practically do not protrude beyond the port, larger ones look like flash drives. For ease of placement or better reception (for example, to physically bring the adapter closer to the access point) it is possible to connect via an extension cable.
Since USB is a universal port, then external models can be connected to almost any computer - even to a stationary one, even to a laptop. Modern operating systems can recognize most of these models. Such a USB adapter for the computer is automatically activated after installation.
Please note that the transmission speed of the most modern models may exceed the capabilities of the old connectors. For example, USB 2.0 will not be enough to use the entire channel of 802.11ac adapters - they must be connected to high-speed USB 3.0 ports.
Occasionally come across models with a connection to the Ethernet connector. In this case, the connection between the adapter and the computer is established via a regular network cable.
Internal wifi adapters
Internal options are provided for installation in the system unit. Outside, they may not be visible at all - of course, if the model does not have a special external antenna to improve reception quality. But in this case, it is located on the rear end of the PC and almost does not catch the eye. So if the appearance of the computer is critical, and even it is undesirable to occupy USB ports, then it is better to dwell on this option.
Please note that with a completely internal installation, the signal may pass worse, since the metal elements of the case will block it. For models with a remote antenna, such difficulties almost never arise. Some adapters also provide for replacing the outside with a more powerful antenna.
A typical installation option is inside the system unit in a PCI Express slot, as for a regular network card. The PCI standard is less common as it is already becoming obsolete. At the same time, portability suffers, since quickly moving the adapter to another PC will not work, as well as easily moving it to improve reception quality.
Wi Fi Card Bus Adapters
The rarest type of adapter that has virtually ceased to be produced. To install it, you need a special connector. The pluses include compact dimensions and a very simple setup, and the minuses (along with low prevalence) are low power. Most often, such models are used in laptops - for example, when the main adapter fails.
Wi-Fi adapter D-Link DWA 525
An affordable internal model for connecting a PC to the network is DWA 525 from the company. To connect to a Wi-Fi router, it can use 802.11 b / g / n standards, which gives a maximum speed of 150 Mbps. In most cases, this is enough for reliable work in the apartment. The model supports WEP / WPA / WPA2 encryption. To install, you need a free PCI Express or PCI slot - both versions are available, so you need to clarify which model you are purchasing.
The antenna at the adapter is removed. The manufacturer guarantees the operation of the device in OS from Windows XP to version 8 inclusive.
WiFi adapter ASUS PCI N10
Another internal adapter. The characteristics are similar to the previous model: installation in a PCI port, transfer rates up to the same 150 Mbit / s thanks to an external antenna and the ability to work within 802.11n. To quickly configure the connection, you can use WPS, while the connection will be automatically via an encrypted channel. An additional plus - the adapter can work as an access point.
Wi-Fi adapter for desktop PC
If the signal is weak, then the laptop can be moved closer to the access point. With a desktop computer, this trick will not work. Therefore, you must immediately choose a model, taking into account the conditions at the place of its installation. So, in an apartment with a complex layout or thick walls, a more powerful option may be required. But you can not limit yourself to an assortment of only external models or modify an existing one if the antenna does not cope with the reception.
How to choose a Wi-Fi adapter
If you have already chosen between the internal and external installation options, it's time to get acquainted with the technical characteristics of the devices. Pay attention to the following key points when choosing a Wi-Fi adapter for PC:
- compatibility with existing devices (first of all, access point - router);
- support for standards, as it determines the transmission rate;
- frequency used;
- transmitter power in the adapter;
- the ability to encrypt the connection;
- receiver range.
You should not be limited only to the speed written on the package. This is the theoretical maximum limit for this model. The real factors are affected by the above factors.
Also pay attention to the future place of work. If the system unit is hidden in the depths of a massive table, then it would be logical to try to take out the antenna using an extension cord higher.
Sometimes it is recommended to use an adapter of the same company that released your router. There is a sense of common sense in this: the manufacturer can test the equipment for stability of joint work, and the software interface will most likely be similar. In practice, popular models quite successfully connect to routers of other manufacturers. Difficulties due to different manufacturers are extremely rare, as a rule, with old equipment.
Compatibility
First of all, check if the computer has an appropriate free port. The PCI Express adapter will not work in the USB slot, nor in a regular PCI, and the model with Ethernet connection in the Card Bus slot. As for the operating system, everything is simpler: popular models support the Windows and Mac OS lines at a decent level. A complete list is provided on the packaging or in the accompanying documentation.
If you need to connect a specific device (for example, on an old version of Windows or a rare OS), first make sure that the appropriate drivers are available on the manufacturer’s website or in the bundled disk.
Standard
Support for one or another communication standard determines the possible high-speed communication modes between the adapter and the router. To work at high speed, you need the support of modern 802.11n or 802.11ac. If you use a device that supports only g or even b standards, then the connection speed will be very, very limited - it makes sense to do this only if the router does not support faster options.
If you connect using a slow adapter, the router will automatically go into reduced performance mode. In this case, all other connected devices will also be forced to work at a lower speed.
The minimum reasonable requirement is support for the n version of the standard. It provides speeds of 150 or 300 Mbps, depending on the model. This will be enough for comfortable surfing the network, and for watching video content without long waiting.
The 802.11ac standard is characterized by support for the frequency of 5 GHz and is gradually gaining popularity. It provides data transfer already at speeds up to 10 Gb / s. True, such a speed in home equipment may not be useful. Unless you want to choose an adapter with an eye to the future, or for professional purposes like participating in online game tournaments or regularly working with large amounts of data.
Frequency
Two different frequencies are used to operate wireless equipment. Older or cheaper models usually use only the 2.4 band, newer and more expensive ones can work in both bands or exclusively at 5 GHz. Therefore, you need to make sure that the adapter and router can "make friends" and use the same frequency for communication.
Advantages of increased frequency - increased data transfer speed between devices. In addition, in this range you can place more channels without mutual overlap. That is, individual access points, even at close proximity, will not interfere with each other's data transmission. And since such devices are more expensive, then the radio in this range is less busy, which positively affects the stability and speed of the connection.
However, this approach has a drawback: a high-frequency signal penetrates worse through walls and other obstacles. Because of this, the radius of reliable reception, ceteris paribus, it may be smaller. If possible, it is recommended to check both connection options and choose the best one for a particular computer from them.
Transmitter Power
The power of the Wi-Fi transmitter adapter for the computer determines the range over which the radio signal will be distributed. The higher it is, the more confident the connection with the router will be maintained. This means that the data speed will be higher. On the other hand, legislation limits the maximum capacity.
If there are obstacles between the computer and the router, it is better to focus on values \u200b\u200bof the order of 20 dBm. In conditions of direct visibility (for example, if the access point is in the same room), you can use less powerful models.
Access encryption
Wireless connection due to the use of radio waves has a significant drawback: if you have the equipment and are near the transmitter, anyone can receive the signal. That is, data is actually transmitted in an insecure environment. So you need to take care of access encryption so that no one outsider can connect to the channel and view what is transmitted on the air.
The modern WPA2 standard is a set of technologies aimed at protecting data. An enhanced version of the WPA3 standard has just been announced. But it is better to immediately abandon the outdated WEP, since hacking technologies have already been developed for it.

Action range
An important parameter is the range of signal reception. After all, Wi-Fi is of little use if you have to spend all the time near the access point. The more powerful the transmitter, the better the antenna, the greater the distance you can confidently maintain radio communications. However, it should be borne in mind that the manufacturer indicates this parameter for ideal conditions with numerous reservations. The fact is that the presence and material of the walls between the router and the adapter, the degree of noise of the radio air (the number of routers or other radio equipment nearby), the used frequency range, etc., affects the range.
Other parameters
Pay attention to the support of MIMO technology. Despite the ridiculous reduction, it allows you to improve the signal: instead of using one, several antennas are allowed, both from the side of the router and on the adapter. In the standard version n, 4 pieces are allowed, and ac - immediately 8. Since they all work in parallel, the speed increases several times. It also has a positive effect on the stability of the compound. True, such adapters are somewhat more expensive.
If you also need to distribute Wi-Fi to nearby devices, check SoftAP support - this mode allows you to use the adapter as an additional signal transmitter. Then you can install one powerful module in a PC, and connect a smartphone or tablet to it already.
If an adapter is purchased to communicate directly with devices, be sure to support the appropriate technology. For example, it could be Wi-Fi Direct or Miracast. Otherwise, the adapter will not benefit.
Configure and connect a Wi-Fi adapter
Next, we will analyze how to configure the purchased adapter. First you need to connect it to the appropriate connector. To connect via PCI or PCI Express, you will need to open the system unit. Then you need to carefully, without excessive pressure, put the adapter in the slot and make sure that it is fixed there. If the module has an external antenna, it is necessary to remove the plug from the rear wall and replace the bracket with the adapter. With external models, everything is much simpler: you just need to connect it to a free USB.
Popular models are well recognized by modern operating systems. The OS can independently install all the necessary drivers and activate a new device. In this case, additional configuration may not be necessary - the computer will simply be able to connect to wireless networks using standard methods.

If the system did not cope with the installation in automatic mode, you need to help it. Drivers can be found on disk (if it was bundled with the device) or on the manufacturer’s website. To activate additional functions, such as distributing Wi-Fi from a computer or fine-tuning transmission parameters, a special proprietary utility may be required.
First steps
After installing the software, check for connectivity. If the drivers are installed correctly, then the computer will be able to connect to your router. Specify the correct name for the access point and password. If necessary, configure interaction with the router - select the desired frequency range and the required standard, optimize communication using proprietary utilities.
Network issues
Sometimes, after installation, the network is unstable. The reasons can be different: incorrect configuration of the router or the computer itself, software problems or even a malfunction of the adapter. This is manifested in the fact that the connection is interrupted some time after the connection or the computer does not see Wi-Fi.
The reason why this happens may be trivial: the activated power saving mode for the adapter. This is often found on laptops, the OS optimizes power consumption, turning off all the "unnecessary". To check, you need to open the settings in the properties of the wireless connection. Then, on the power management tab, you need to uncheck the box that allows you to turn off the device.

Problems with a router
It is also necessary to check whether other devices can connect to the router. For example, using a smartphone or tablet. If the other device successfully establishes a connection and stably supports it, it means that the router itself works correctly. Also try rebooting the router.
Otherwise, you need to check the configuration of the access point: is it using a compatible standard, is the same radio channel selected (if automatic tuning is disabled), is the correct password specified. As a last resort, you can reset the router to factory settings and then configure it again, checking each step.
It is also possible that a router firmware update is required. In this case, you will need to download it from the manufacturer’s website and then update it through the router control panel. Detailed instructions for a particular model are usually listed in the user manual.
If all these measures do not help, make sure that the device is working properly. For example, contact a manufacturer’s service center for verification.
Software
Also, the problem may lie in the outdated profile of the wireless connection - if the settings of the router have changed, and the operating system does not know about it. Then you need to delete the profile, after which it will be created again. First, run the command prompt (CMD), and then run this command, specifying the profile name instead:
netsh wlan delete profile name \u003d
After that, you will need to re-enter the password when connecting to the router.
If a message is displayed that the connection is limited, you can set the TCP / IP settings to their default values. To do this, the command line uses this technique:
netsh int ip reset c: \\ resetlog.txt
After rebooting, check the connection.
If this does not help, check if the driver installation is correct. In the OS control panel, select Device Manager, then check your in the list of network adapters. Open its settings and try reinstalling the driver (uninstall and reinstall). Use drivers from the official site. You can also try installing an older version of the driver (with a lower index).
Adapter malfunction
When the above measures do not help or the adapter is not even detected by the system, it is possible that the matter is in the device itself. For reliability, you can try installing it on another computer. If it worked there, you need to check the settings of your computer. If the adapter also refuses to function on another machine, it must be replaced (if the warranty is still valid) or repaired.
Fast Internet to you!
![]() For wireless connection to the Internet, today only two standards are widely available - GSM and Wi-Fi. The use of GSM (including 3G and LTE) has become the de facto standard in M2M industrial applications. The use of inexpensive Wi-Fi chips targeted at the gadget market was limited by the complexity of the development and the reluctance of manufacturers to provide technical support to developers of M2M devices. Today the situation has changed - the company Texas Instruments released Wi-Fi modulespecially designed for the market "Internet of things" and having a price of less than $ 10 (price on the manufacturer’s website). The article discusses the features of the practical use of the module in conjunction with low-cost processor boards .
For wireless connection to the Internet, today only two standards are widely available - GSM and Wi-Fi. The use of GSM (including 3G and LTE) has become the de facto standard in M2M industrial applications. The use of inexpensive Wi-Fi chips targeted at the gadget market was limited by the complexity of the development and the reluctance of manufacturers to provide technical support to developers of M2M devices. Today the situation has changed - the company Texas Instruments released Wi-Fi modulespecially designed for the market "Internet of things" and having a price of less than $ 10 (price on the manufacturer’s website). The article discusses the features of the practical use of the module in conjunction with low-cost processor boards .
The concept of Internet Of Things implies connecting to the network of things around us, such as household appliances, cars, sports simulators, engineering and security systems of buildings - almost any items with which it makes sense to exchange information (Figure 1).

In one case, this can be information, the generation of which, in fact, is the main function of the device (temperature sensor), in the other case, it will be auxiliary data that enhances usability, for example, notification of a work process or breakdown. The process of connecting items to the network started more than ten years ago. Initially, these were wired networks for access to equipment in the field of energy and to expensive technological equipment in industry. Over the past five years, the number of M2M networks of energy meters has been growing rapidly in the world, navigation services for tracking vehicle transport and wireless security systems are developing. A significant increase in the number of networked machines was made possible thanks to the development of wireless technology. Electronic components for wireless data transmission occupy a prominent place in the lines of all major microchip manufacturers without exception, and young companies that have original developments in this area are being bought up by large players like hot cakes. The proliferation of laptops, tablets and smartphones has provided a large number of people with access to the network. The miniaturization and reduction in the cost of electronic components made it possible to connect a variety of household appliances to the network (Figure 1), including things that never claimed to be “intellectual”, such as glasses, sneakers or even cutlery (Figure 2). Today we are on the verge of the next round of development of the “Internet of things”. Experts predict that by 2020, from 30 (Gartner) to 75 (Morgan Stanley) billion things will be networked.

Technical parameters and connection
The SimpleLink Wi-Fi module (Figure 3) was first introduced by Texas Instruments at CES 2012. The module is based on time-tested sixth-generation TI Wi-Fi solutions that already work in millions of consumer devices around the world. CC3000MOD is positioned by the manufacturer as a complete hardware and software solution with integrated network protocols that allows you to add wireless Wi-Fi access to the product even with a small microcontroller. Integration of the module does not require special knowledge in the field of high-frequency circuit design. Guaranteed radio parameters and, as a result, the absence of problems during certification are ensured by 100% output control during production.

Fig. 3. Wi-Fi SimpleLink CC3000MOD
The technical parameters of the module are given in table 1, for the module to work, a minimum of external components is required (Figure 4). The module contains a controlled stabilizer for the built-in processor and can operate both from a mains power supply and directly from a lithium-ion battery. To turn off the power, you can use the built-in key, which is controlled via the VBAT_SW_EN line from the host's GPIO port. The separate voltage of the I / O lines facilitates level matching for connecting the control microcontroller with any supply voltage within 1.8 ... 3.6 V. The module does not require quartz or external clocking, but it can itself generate a 32.768 kHz signal to the EXT_32K line.

Table 1. Specifications CC3000MOD
| Standard | 802.11 b / g, BSS Station |
| output power | TX power: +18.0 dBm at 11 Mbps, CCK |
| Sensitivity | RX sensitivity: -88 dBm, 8% PER, 11 Mbps |
| Security modes | WEP, WPA / WPA2 (AES and TKIP - Personal) |
| Built-in Protocol Stacks | TCP / IP stack (IPv4 - DHCP client, DNS, mDNS, ARP), Wi-Fi driver, security supplicant, Auto-calibrated radio |
| Software interface | BSD-sockets (~ 35 APIs) |
| The volume of FLASH and RAM on an external microcontroller, KB | 5 (Flash) and 3 (RAM) |
| External control interface | SPI 16 MHz |
| Bandwidth (TCP), Mbps | ~4* |
| Number of concurrent open connections | 4 sockets (UDP or TCP) |
| Power modes | Active mode (92 mA, typ. Current RX); shutdown mode<5 мкА |
| Supply voltage | 2,7…4,8 |
| Operating voltage for input / output lines (I / O Voltage), V | 1,8…3,6 |
| Sizes, mm | 16.3 × 13.5 × 2 |
| Temperature range, ° C | -20…70 |
| Firmware update | Via Download Patch in EEPROM |
| Helper Interfaces | I 2 C for direct access to EEPROM UART for radio part testing |
| Certification | FCC, IC, CE (for version with a CHIP antenna) |
* - measured when working in conjunction with the MSP430FR5739 microcontroller.
The main control is carried out on five lines of the SPI interface (Figure 5). The CC3000MOD acts as a slave device. Clock frequency 0 ... 16 MHz. Data transmission is carried out in blocks of 16 bits, the first is the most significant bit. Reading data occurs on the decline of the CLK signal (CPHA \u003d 1). If the length of the block is odd, then at the end you need to add the optional alignment byte. A special IRQ line (from the CC3000MOD to the host) notifies the Master (control microcontroller) that the CC3000MOD has some data that needs to be read. The same line indicates the CC3000MOD is ready for SPI data exchange.

The structure of the SPI packet is shown in Figure 6. The first is the “Command” byte, which includes the sign of writing or reading data. Next, in two bytes, the length of the block is indicated taking into account the alignment byte. The packet header ends with two Busy bytes. The SPI protocol format used is an extension of the standard SPI. When sending the very first SPI packet, you need to insert two pauses of 50 μs after setting the CSn signal and between 4 and 5 bytes (between Busy bytes).
An example of the HCI_CMND_SIMPLE_LINK_START SPI package, which should be sent first by the host after power is supplied, is shown in Figure 7. To perform all data transfer operations via a Wi-Fi network, the manufacturer provides an API set in the form of a platform-independent source C code host driver, so the developer does not have to study the data transfer format at the HCI level.

The on-board EEPROM memory is used to save the network configuration, MAC address, and firmware update, which is implemented as a download of small patched pieces of code (Patch). Firmware updates (patches) are issued by the manufacturer. Access to the EEPROM is possible both directly, through a separate I 2 C service interface, and through the main SPI management interface using a special API. EEPROM has a free area of \u200b\u200babout 5 Kbytes, where you can store user data.
The UART interface (lines WL_RS232_RX and WL_RS232_TX) are intended for direct control of the radio chip in order to test the radio frequency parameters in the production of the module. The special Windows utility CC3000 Radio Tool allows you to initiate continuous reception or transmission to calibrate the radio. In principle, in the developed product, these lines can not be connected anywhere.
To resolve complex problems with the Wi-Fi protocol, it is possible to extract logging information from the internal registers of the CC3000 chipset. Debugging information exists in two layers - the driver level (Driver level from pin NS_UART_DBG) and the internal firmware level (Firmware level from pin WL_UART_DBG). Each level is output through the output of the CC3000MOD module specially allocated for these purposes - NS_UART_DBG is present on pin 2, while WL_UART_DBG is routed to pin 4. Data is output via the serial UART interface with an operating voltage of 1.8 V in the format 921600/8 / n / 1. To retrieve information on a PC, you must run any terminal program and save the incoming data in a binary format (not text!). The data analysis is carried out by the technical support of the manufacturer - documentation on the format of debug data is not available to the developer.
Two layers of a printed circuit board are sufficient for the module wiring, although the reference design is divorced in four layers. It is not recommended to draw signal lines under the module on the layer where the module itself is mounted. When using four layers, it is recommended to make layer 2 a solid earthen polygon for heat dissipation. Connecting the antenna must be done using a coordinated 50-ohm line, when using ceramic antennas, you must strictly follow the manufacturer's recommendations for distances from the antenna to the ground lines and the boundaries of the printed circuit board. SPI lines are required to be made as short as possible. The VBAT power line must be at least 40 mils, the VIO_HOST line at least 18 mils. If possible, the VBAT line should be surrounded by earthen polygons on all sides.
Program management
The software for the external control microcontroller (host driver) allows you to organize the interaction of the user application with the CC3000MOD through a small (~ 35) set of API functions. The source code of the host driver can be ported to any microcontroller. To implement the API on an external microcontroller, you need to have free resources of about 7 Kbytes of FLASH and 3 Kbytes of RAM, which is 100 times less than Wi-Fi modules running Linux, Windows or Android. Ready-made examples of applications from TI exist for microcontrollers and (Cortex-M4 core), links to the successful operation of CC3000MOD libraries on microcontrollers can be found on the network.
The structure of the host driver is shown in Figure 8.

The host driver has a modular structure, which allows you to adapt it even to microcontrollers with limited resources - for this you can disable the optional software blocks. The driver is well documented and is not tied to a specific type of microcontroller or any operating system. The manufacturer himself uses this driver in examples for microcontrollers with a completely different internal structure - MSP430 and CORTEX-M4 (TIVA). When compiling in the minimum mode (Tiny Compilation Option), the driver can work on a microcontroller with 2 KB of FLASH and 251 bytes of free RAM. Of course, such minimalism leads to a limitation of the size of the data packet sent over Wi-Fi to 8 bytes. When compiling with all options turned on, the resulting code for the microcontroller yields approximately 7.2 KB for the IAR compiler.
The host driver provides access to all the features of the protocol stack built into the CC3000MOD:
- IPv4 TCP / IP stack with BSD socket APIs;
- support for simultaneous operation of TCP or UDP sockets;
- network protocols: ARP, ICMP, DHCP client, DNS client.
The set of custom API functions is divided into four categories:
- WLAN APIs. A set of functions that are related to the operation of the 802.11 protocol. This includes, for example, actions such as setting the SSID and password, scanning the air to get a list of available networks, etc.
- Network Stack APIs. Interaction with the built-in TCP / IP stack - specifying ports, creating and opening sockets, receiving and transmitting data. The API structure corresponds to the well-known BSD set (Berkeley socket APIs).
- Network Application APIs. Ancillary network operations that a user application may engage. For example, the PING utility or DNS.
- NVNEM APIs. Interaction with built-in non-volatile memory in CC3000MOD (32 Kb EEPROM). Firmware update, saving network settings (profiles), writing and reading user data (up to 5.5 KB).
Each group of APIs works with commands (CMDs) and events (Events). Events are processed through registered Call-back-functions. Events can be of two types - those that are formed as a result of the execution of commands and the so-called unsolicited events. Unsolicited events are not related to user actions, for example, a message to the host about disconnecting from the network due to loss of radio signal. Due to the fact that the host driver does not use the queue mechanism, an unsolicited event handler should be called at least every 500 ms.
Table 2 shows examples of asynchronous events that are generated by the CC3000.
Table 2. List of asynchronous events
To connect to pre-known networks in non-volatile memory, you can save up to seven profiles. Each profile includes the access point name, encryption type used, and password.
The WLAN Policy defines the CC3000MOD's power-up behavior. Three algorithms for connecting to a Wi-Fi network are possible:
- automatic connection mode (Auto Connect) - connection to any available Wi-Fi network during the scan;
- fast connect mode (Fast Connect) - connection to the last available network in which the previous session was working;
- profile use mode (Use Profiles) - connection to a Wi-Fi network, the parameters of which are registered in non-volatile memory.
SmartConfig ™ Technology
The CC3000MOD module is designed to be embedded in devices that sometimes do not have the usual user I / O interfaces, such as a display and keyboard. To connect to a Wi-Fi network, the device must provide the network name (SSID) and encryption key (KEY). How to transfer these text lines, for example, to a table lamp, in which the user interface consists of a single power button? For devices equipped with the CC3000MOD, TI offers the original SmartConfig technology. This technology allows you to quickly configure a wireless Wi-Fi device using an auxiliary mobile gadget operating on the same network to which we need to connect our lamp. A special free application is launched on a smartphone, tablet or laptop (iOs, Android, Windows), which allows you to transfer settings to a connected device. The SmartConfig ™ application can connect multiple devices at the same time, while transmitting parameters over the air is possible in the optional safe mode (AES-128).
Starting a connection on a device can be initiated with a single button. SmartConfig technology can work with SSID and KEY up to 32 characters long. An example application for the iPhone is shown in Figure 9.

From a technical point of view, the SmartConfig procedure is as follows:
- The CC3000MOD enters the SmartConfig state and begins to monitor UDP packets that contain information about the SSID and key of the access point to which the CC3000MOD will connect;
- after the CC3000MOD receives all the information for connecting, the module generates an asynchronous SIMPLE_CONFIG_DONE event to the host and stores the information in non-volatile memory (EEPROM of file ID 13);
- the SmartConfig procedure can be performed with optional AES-128 encryption. This is determined at the stage of compiling the host driver using the corresponding flag of the development environment (flag CC3000_UNENCRYPTED_SMART_CONFIG);
- when choosing AES-128 encryption, the auxiliary configuration device (smartphone) will encrypt information using a specific key entered in advance into the device with CC3000MOD;
- when choosing AES-128 encryption, the host first decrypts the access information, then saves it as a profile;
- if AES-128 encryption is not enabled, the CC3000MOD immediately saves the access information in the form of a profile;
- as soon as the SmartConfig process is completed and the profile is saved, the CC3000MOD performs a reset and connects to the desired access point. The mDNS packet is sent to the configuration device (smartphone) in order to inform about the end of the configuration process.
The SmartConfig procedure in most cases occurs within the first 10 seconds after the start. However, in the case of a large number of access points, you should expect a result of at least a minute.
Development tools
The CC3000MOD module has good documentation and is supported by a large set of TI development tools. For testing the module, simple Launchpad series boards based on microcontrollers are suitable , and multifunctional processor-based development tools , , , . To work with these boards, you can use quick-detachable evaluation modules on the connectors (mezzanine boards), which are small adapter boards with a sealed CC3000MOD module, an antenna, and the minimum necessary wiring (Figure 10).
Fig. 10. CC3000MOD Mezzanine Boards for TI Development Tools
 |
 |
 |
 |
* - these boards are built on modules from third companies (with the CC3000 chipset). These mezzanine boards are sold on the TiStore online store and are part of some TI demo kits. For replacement, it is recommended that you use a compatible CC3000EM mezzanine board based on the CC3000MOD module.
The manufacturer provides several examples of applications that implement typical operations for exchanging data via a Wi-Fi network. Table 3 lists the demo applications.
Table 3. Development Tools and Demo Applications
| Software interface | Demo application | Development tool |
 |
Dispatch Email (Simple Email). The application allows you to send an e-mail message through a Simple Mail Transfer Protocol (SMTP) server. User interaction occurs through any terminal program |
|
 |
Wireless sensors (Wi-Fi Sensors). This application sends data to the PC from the MEMS accelerometer and temperature sensor. The temperature, IP address and board slope are displayed on the PC as a planet flying in orbit | |
 |
Home Automation The app shows how the CC3000MOD can control household appliances via Wi-Fi. As a control panel, any smartphone based on Android OS is used | |
 |
Connect to a cloud server (Cloud Service). The application shows remote data collection and management of an M2M object using the Exosite cloud service. The board sends data from a temperature sensor and six ADC channels. Through the WEB-interface, you can view data in the form of graphs, dashboards and diagrams. Using the button on the site page, you can control the LED on the board. | |
 |
Basic Wifi app* (Basic Wi-Fi Application). The simplest application that allows you to connect to an access point, send and receive data via UDP. Interaction with the user occurs through any terminal program. * - Available versions for the following microcontrollers: MSP430G2553, MSP430FR5739, MSP430F5529, TM4C123GH6PGE, LM4F120H5QR, MSP430FG4618, TM4C123G |
|
 |
Simple Network Time Protocol. The application allows you to get the exact time using UDP requests. Requests are sent to one of nine predefined NTP servers. The function is implemented as part of the Basic Wi-Fi Application as an additional 0c command |
|
 |
Multithread data exchange (Multithread - TI). The application shows the possibility of simultaneous operation of several TCP sockets (1 Tx, 2 Rx). Demonstration of functionality occurs through the debugger of the CSS development environment Debug | |
 |
Plain HTTP server (Simple HTTP Server). The application shows how you can implement the simplest HTTP WEB server with static and dynamic pages based on the CC3000MOD module. Using any browser, you can control the LEDs on the board and read the position of the rotary joystick |
|
 |
WEB server and client (Web Server & Client WSC application). The WEB server supports several static pages and demonstrates working with dynamic pages in HTML format based on a weather server. Dynamic pages are used to display locations. WEB-client receives weather data in XML format using the Google weather service |
|


TI sample applications are provided along with the source code as ready-made projects for CSS and IAR development environments. For fans of the Arduino platform, a number of third-party companies offer compatible boards based on the CC3000MOD (Figure 11).
Fig. 11. Boards with CC3000 module for Arduino platform
 |
 |
 |
For those developers who are not ready to install the development environment, the manufacturer provides test applications for CC3000MOD in the form of an executable exe file that includes a programmer and, in fact, firmware. When launched, this application finds the Launchpad board connected to the PC and downloads the application “in one click”.
Conclusion
The CC3000MOD is a Wi-Fi wireless network processor that greatly simplifies the Internet connection for any device, even with a weak microcontroller on board. The low performance and memory requirements of the host controller allow the CC3000 to be integrated into fairly simple and inexpensive products - household appliances, medical and measuring equipment. Open source code and a large number of inexpensive debugging tools, ready to work almost out of the box, significantly speed up and facilitate the process of implementing engineering ideas of the developer.
Obtaining technical information, ordering samples, delivery - e-mail: